Website Templates
 Flash Templates
 Flash Intro Templates
 SWiSH Templates
 Logo Templates
 Corporate Identity
 PHP-Nuke Templates
 osCommerce
 Logosets Templates
 Icon Sets Templates
 phpBB Skins Templates
 Zen Cart Templates
 Word Press Themes
 CRE Loaded Templates
 All Types
CLIENT TESTIMONIALS


Highly professional, courteous, always willing to help the clients, always bring new ideas for the design...I am happy that I found you...You will be on my top priority to recommend others who would like to create their website...thanks and great job.

Classic Websites and their staff are committed to provide their customers with great service and product. I am happy i met them.


You did a great job. I loved the patience that you had with me. I’m sorry for the all the inconveniences. I’m a very busy man and Thanks for the patience.. God Bless you.

K-SOFT is an excellent web developing company which understands the client requirements and goes that extra mile to accomplish objectives

I have had a couple marketing and business professionals look at the site and they tell me it is very "professional," which makes me feel good. Excellent job. No matter what assignment I give to Classic Websites, it is done quickly, and professionally.

I am pleased with the way the website looks and my position in the searches engines for "noisy water heater." I do refer my clients to Classic Websites.

Tutorials >> Photoshop Tutorial
What do you want to know more about?
Opening PSD File
PSD file is layered easy to modify image file. It contains all image sources for your web design template. To manage files of that type you need Adobe Photoshop software installed on your computer. You can do any kind of customization using Adobe Photoshop because this powerful tool allows you to change text, image colors, add your own photos to your web design template and save optimized image data for web.

First step to manage your PSD file is to open it with Adobe Photoshop. It's quite easy. To open PSD file you should select File/Open from top menu and browse to the location of your PSD file. Another and more simple way to open file is just drag and drop it from file browser to your Adobe Photoshop window. Also if PSD files on your computer associated with Photoshop software you can just double click it in your file browser and this file will be opened and ready to use.

Note: If you see alert message that says "Some layers contain fonts that are missing" it means that you've not installed all fonts included in package. To get more information about fonts installation read Font Installation section.
Changing Text in Adobe Photoshop
Most part of content text is represented in HTML as plain text to simplify its modification and allow search engines to scan your information. It will increase your page rank and number of your Website visitors. But to make people to stay on your Website or return there later your pages have to contain not only useful content but perfect external view. That's why some portion of text represented as images in HTML document and editable in PSD file using Adobe Photoshop software. Below will be described ways of editing such text, to know how to edit HTML plain text read Changing HTML text section.

Actually you can add text using any graphical editor you want. As we are providing all image blocks with hidden text. But this way of web design template modification is not recommended because you are not being able to create same font style and effect.

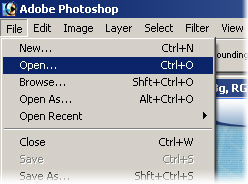
When your PSD source file already opened in Adobe Photoshop, press "T" key to use type tool. Click with type tool cursor the text you want to edit. If "The following fonts are missing..." message will appear it means that you have not installed all fonts needed to modify text. For instructions of how to install they read Font Installation section. If appearing message says "Editing or rendering the text layer..." never mind it, everything will be editable without any problems.

If your text field should contain several rows, you can start typing from the new line by pressing "Shift + ENTER".

You can quit editing mode by pressing "Ctrl + Enter". If you want to discard all editing changes press "ESC" key to quit editing and undone all changes.

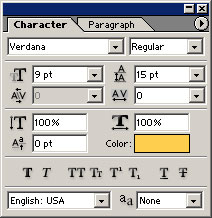
If you want to change some of text attributes such as font family, style or color do the following. Select text which properties you want to modify. Then go to the options panel at the top of the screen. If you can't see it for any reason, show that panel by selecting Window/Options from top menu.

At the options panel you can see four dropdown menus, text align icons and color bar. First dropdown menu allows you to change font family, but we recommending you not to change it. Our professional web designers already selected best looking font for this web design template.

Second dropdown box contain font styles. Bold, Italic and Regular styles available there.

Next dropdown represents font size. Use bigger font sizes for your company name and slogans and smaller fonts for buttons text and section headers.

Last dropdown changes text rendering style. Use this option to make your text look softer and more professional.

To change text color click color bar at options or tools panel to call color picker window.

More advanced options can be specified in type panel. To launch it you should press "Ctrl + T" while editing.

After you have done all text modifications you should update those changes to your web design template. For detailed instructions of how to do it read Update changes to your template section.
Changing Images in Adobe Photoshop
Important step in creating unique Website from our web design template is to insert your company logo and image content there. If you are starting new web project and don't have company logo yet you can purchase exclusive logo in our company.

First of all open your PSD source file in Adobe Photoshop. You can get info about that in Opening PSD file section.

Before inserting your own image in your web design template source you should remove or hide original image. Hide image if you don't sure about need of this image in the future, if you don't need it - just remove it. Anyway to do both of these operations you should locate layer containing it. The easiest way to do that - is to control click it, just click on this image holding "Ctrl" button. But if some transparent layers exist over this image layer you'll have some troubles with it. Top layer will be selected instead of your image layer.

To check content of current selected layer do the following. Go to layers panel, choose Window/Layers if you cant see it for any reasons. Find out highlighted layer in layer list - this is the current selected layer. At the left of the layer name you can see "eye" icon. Click it some times to hide/unhide layer and see which image element disappears in whole picture. If this is image you want to remove - you are one the right way. If selection is wrong use alternative way to select layer with image you want to remove.

Right click with mouse on image. List of layers containing images under cursor will appear. Try to choose different layers from that list. Use procedure described above to make sure that you have selected right layer.

All right now you have selected layer with image you want to remove. To hide it, click on "eye" icon at the left of layers name. If you want to remove it click trash can icon at the right bottom corner of layers list panel.

You can add your own image to PSD file in very simple way. Just drag and drop it from file browser to your Adobe Photoshop window. Or you can use File/Open... form the top menu. Your image will appear in separate window of Adobe Photoshop program. You can do prior modifications there. For example you can crop it using crop tool (hotkey "C") or make some color adjustments to make image fit templates color scheme selecting Image/Adjustments/Color Balance... from the top menu.

Next step - is to move your image to your web design template PSD window. To do it select move tool from tools panel or use "V" hotkey. Then drag and drop image using that tool to your template window of Adobe Photoshop.

Now you can move that image to the right location using same tool. If image that you've just inserted overlapped by other images or text you should move it upper in layers list. Go to layers list panel and drag and drop this layer up until overlapping disappears.

After you have done all images modifications you should update those changes to your web design template. For detailed instructions of how to do it read Update changes to your template section.

Changing Image Colors in Adobe Photoshop
During the customization of your web design template maybe you'll need to change colors of some image elements to fit your corporate colors. This section provides you with instructions of how to do that.

If you want to change color do the separate image you should locate layer containing it. The easiest way to do that - is to control click it, just click on this image holding "Ctrl" button. But if some transparent layers exist over this image layer you'll have some troubles with it. Top layer will be selected instead of your image layer.

To check content of current selected layer do the following. Go to layers panel, choose Window/Layers if you cant see it for any reasons. Find out highlighted layer in layer list - this is the current selected layer. At the left of the layer name you can see "eye" icon. Click it some times to hide/unhide layer and see which image element disappears in whole picture. If this is image which colors you want to change - you are one the right way. If selection is wrong use alternative way to select layer with appropriate image.

Right click with mouse on image. List of layers containing images under cursor will appear. Try to choose different layers from that list. Use procedure described above to make sure that you have selected right layer.

When layer containing needed image is selected do the following. Choose Image/Adjustment/Color Balance... from the top menu or just click "Ctrl + B" hotkey. Color balance window will appear. You'll see three color sliders there. Move them until you'll be satisfied with image color. Now confirm color change by clicking Ok button or reject these changes by selecting Cancel button.

If you want to change color scheme of whole web design template do the following. Select top layer from the layers list panel. Choose Layer/New Adjustment Layer/Color Balance... from the top menu. Confirm creation of new color adjustment layer by pressing Ok button in popup window. In color balance window you'll see three color sliders there. Move them until you'll be satisfied with image color. Now confirm color change by clicking Ok button or reject these changes by selecting Cancel button.

After you have done all image colors modifications you should update those changes to your web design template. For detailed instructions of how to do it read Update changes to your template section.

Update Changes to Your Template
After you've done all appropriate changes to your web design template in Adobe Photoshop you should update those changes to your HTML documents.

First of all you must know some basics about slices in Adobe Photoshop. Each slice in PSD file represents image or background in HTML document. Slices in PSD file marked by blue rectangles. If you can't see slices for any reasons you should choose View/Show/Slices... from the top menu. To manage slices you should use slice tool from the tools panel (hotkey "K"). Actually there are two slice tools in this toolset: Slice Tool and Select Slice Tool . Use "Shift+K" hotkey to switch between those tools. All appropriate slices already placed in PSD file included in your web design template package. So you'll need only Select Slice Tool.

Before updating images using save for web you should make sure that slices you want to save don't overlapping with other slices. For example big background image slice can contain smaller slice for button image. So before saving this slice you should bring it on top. To do it you should select this slice using Select Slice Tool. Then go to the options panel at the top of the screen. If you can't see this panel for any reason you should show it selecting Window/Options from the top menu. At the left of the panel you'll see four slice order buttons: Bring to Front, Bring Forward, Send Backward and Send to Back. Click Bring to Front button to bring this slice to front. If you'll need to update small button image slice in future you should Send to Back this big slice to see that smaller slice.

As you know some of text represented as plain text in HTML, so before saving images containing such text you should hide it. To do it you should select layer containing that text.

The easiest way to do that - is to control click it, just click on this image holding "Ctrl" button. But if some transparent layers exist over this image layer you'll have some troubles with it. Top layer will be selected instead of your image layer.

To check content of current selected layer do the following. Go to layers panel, choose Window/Layers if you cant see it for any reasons. Find out highlighted layer in layer list - this is the current selected layer. At the left of the layer name you can see "eye" icon. Click it some times to hide/unhide layer and see which text disappears in whole picture. If this is text you want to hide - you are one the right way. If selection is wrong use alternative way to select layer with appropriate image.

Right click with mouse on image. List of layers will appear. Try to choose different layers from that list, note that text layers have same name that it's content. Use procedure described above to make sure that you have selected right layer.

If you've selected needed type layer hide it by clicking "eye" icon at the left of layer name in layers list.

Now it's time to update your images using Save For Web procedure.

Choose File/Save For Web... from the top menu or use "Ctrl+Alt+Shift+S" hotkey. Save for web window will appear.

In this window you can change optimization options of images. Actually our designer already set optimization options for best quality/size balance. But if you want your site to load faster you can decrease image quality. Select slice using select slice tool. At the right you'll see panel with image options. You can change value of quality input box for JPEG image or colors for GIF and PNG images.

Now select slice that you want to update by clicking on it with Select Slice Tool. If you want to update several slices at once you should select them holding "Shift" button.

When you have selected all slices you want to update click Save button at the right top corner of save for web window. Save Optimized As window will appear.

Browse to the HTML folder of your web design template. Change File Type option to Images Only and Slices option to Selected Slices. Other options may damage original HTML structure.

If everything goes in right way you'll see pop-up window asking for image replacement confirmation. Confirm that request.
 
If such window doesn't appear make sure that you're saving images to appropriate folder. Also check slice name by double clicking on it. Name and image type must be same as image in HTML have.

Now it's time to check modifications you've made. Go to the HTML folder of your web design template and launch HTML file to see changes.

Call : 1-877-574-7638 or CLICK HERE
 Biz StartUp Package
 software Services
 Personalized Products
 Business Products
 Signs & Banners
 Technology Services
 Marketing Tools
 Web Promotions Services
 Forums & Blogs
 SEO Services
 Reseller Services
 Promotions
 Affiliates
 Photos